Website.com.bn keeps 7 copies (restore points) of your data for the last 7 days. We store the backups on remote backup servers with multiple hard drives. The disks are connected to a hardware RAID controller and configured in RAID. The reason for that is simple. We don’t want to lose your web hosting account’s backups in case of a disk failure.
General overview and accessing backups
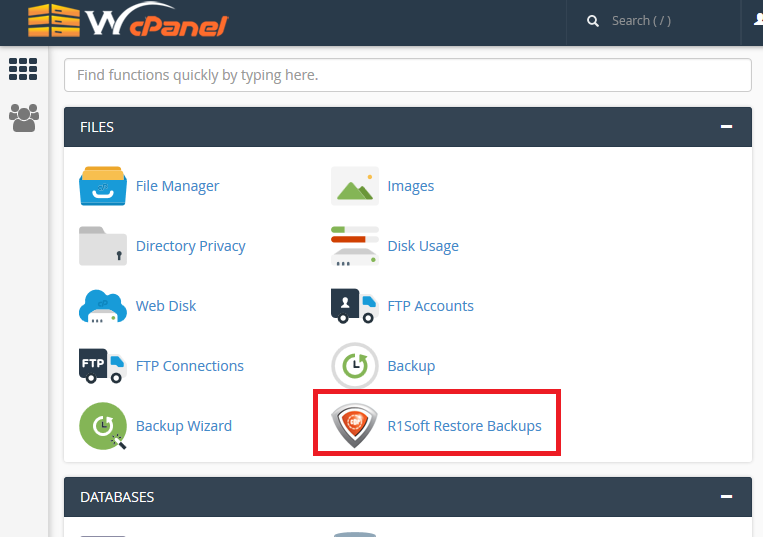
Our customers have access to their backups 24/7 via their control panel cPanel. To start the restore process you will need to login to cPanel and click on the R1soft Restore Backups icon which is under the Files section.
That will automatically log you in the backup server holding the backups of your web hosting account. On that page you will be able to see all available restore points for your account with the exact date and time when they were generated. To the right you will see 4 icons allowing you to perform specific actions.
- The first icon allows you to browse the files in your account and restore them. You can restore any file or directory in your account. You can also restore entire email boxes or separate e-mail messages.
- The second icon allows you to browse the databases in your account and restore any of them.
- The third icon gives you an option to download files or directories to your computer directly from the backup server.
- The fourth icon will restore the whole data of your account to an archive on the server.
How do I restore files?
To restore any of the files in your account you have to click on the first icon which corresponds to the restore point you want to use. See the screenshot below.

A new window will open showing the home directory.
You can do a double-click on it to enter your account’s files and choose
what exactly you want to restore. You can select multiple files and
directories and restore them at the same time. If you have multiple web
sites under public_html you may want to restore the specific web site
only. Double-click on the public_html folder to see the list of the
files and directories under it and select which ones you want to
restore. In this tutorial we will restore the public_html folder which
contains all files of the web site.

Look at the public_html folder in the screenshot and how it is selected for restore. Once you click on the Restore Selected button a new window will pop up.

When you click on the Restore button the restoration process will start. All files which already exist in your account will be overwritten. The system will not remove any other files though. For example, if you uploaded a file after the restore point was generated and you perform a restore, that file you uploaded will not be removed. That’s why if your account was compromised and you want to restore it to a previous state it’s always best to remove the data before you start the restore. It is easiest to remove the public_html folder from cPanel -> File manager and then restore it from the backups. Ensure you have a restore point from the desired date before you remove public_html.
If you want to be 100% safe, rename public_html to public_html.bak and then restore the folder. Then you can remove public_html.bak once you are sure everything is working fine.
Once the restore process starts you can monitor it and watch how the data is being copied from the backup server to your web hosting server.
After a successful restore the following will appear on your screen.
