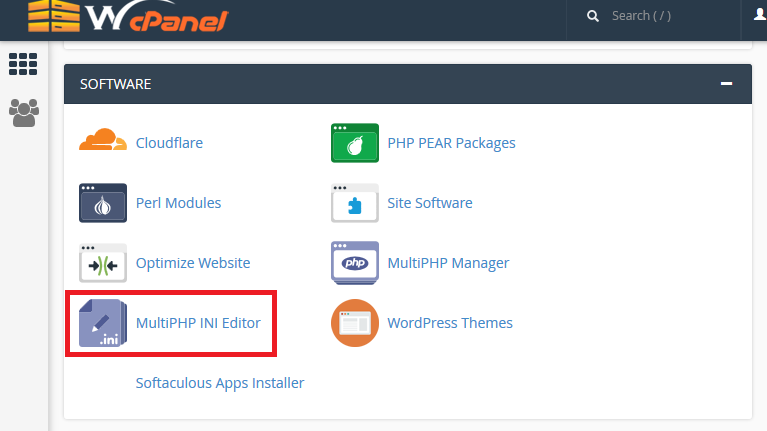
On newer servers running EasyApache4, adding a custom php.ini for your web hosting account is pretty easy. To access the php.ini manager in cPanel
you can login to the control panel and click on the MultiPHP INI Editor. You can find that under the Software section.
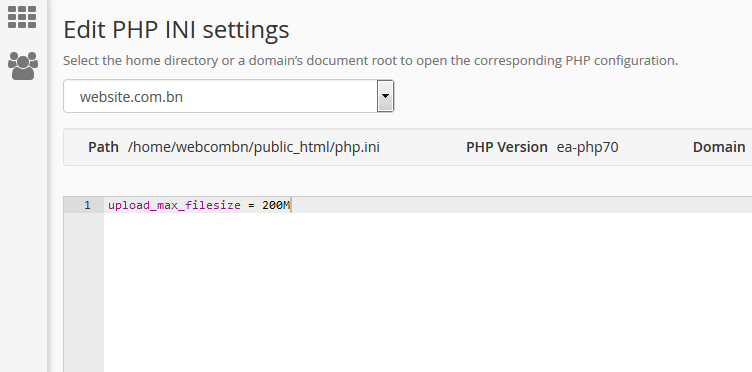
Once you click on it a new screen will load and it will allow you to manage your custom php.ini using the Basic Mode or Editor Mode. The Basic mode includes part of the PHP directives. Those are the most frequently used and modified by customers.

The Basic mode editor allows you to select which domain name you want to set the custom php.ini for. You can also create a custom php.ini for your entire web hosting plan. To do that make sure to select the Home Directory from the drop down menu. Then make the necessary changes from the options below and click on the Apply button. That will create your custom php.ini with the desired configuration.
If you want to change a php option that is not present in the basic mode editor then you need to use the Editor Mode. Click on it and you will see a form with a text box where you can manually enter all directives you want to change. Note you don’t need to copy/paste the entire php.ini config file in there. It is enough to specify just the config option you want to change. For example, if you want to increase the maximum upload file size in php you only need to enter the following:
You can also change the PHP version for your account, to know how, click here.